How to Send PDF for eSignatures
PDFelement's Request eSign feature allows you to send PDF documents to multiple parties securely and electronically while adhering to various legal and regulatory compliance standards. PDFelement eSign aligns with industry standards (ISO 27001, HIPAA), data protection regulations (GDPR), and other internet security-related standards (PDS2, Swift, CMMC, and NITES).
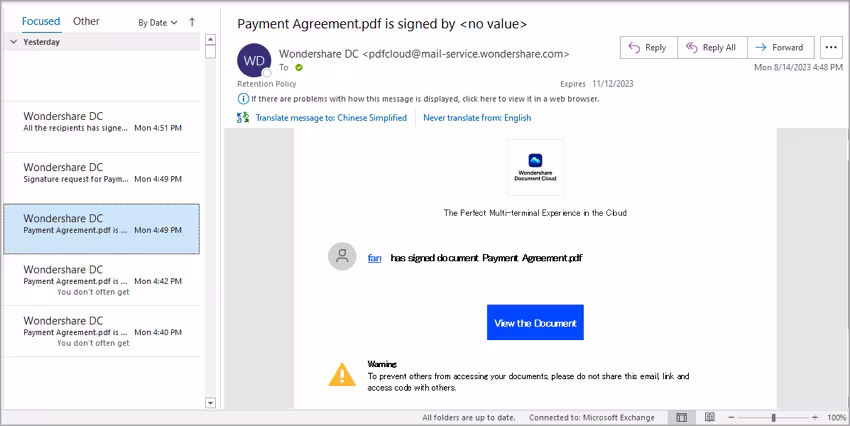
An email is sent to the signers asking them to sign the agreements. Once signed, you and your signers receive the signed PDF by email. You can track the entire signing process in the Agreement panel in PDFelement.
01Collect Signatures from Others
02Track Signing Status
03Validate the Signature
1. Collect Signatures from Others
To initiate a smooth and organized process of collecting signatures from multiple recipients, follow these steps:
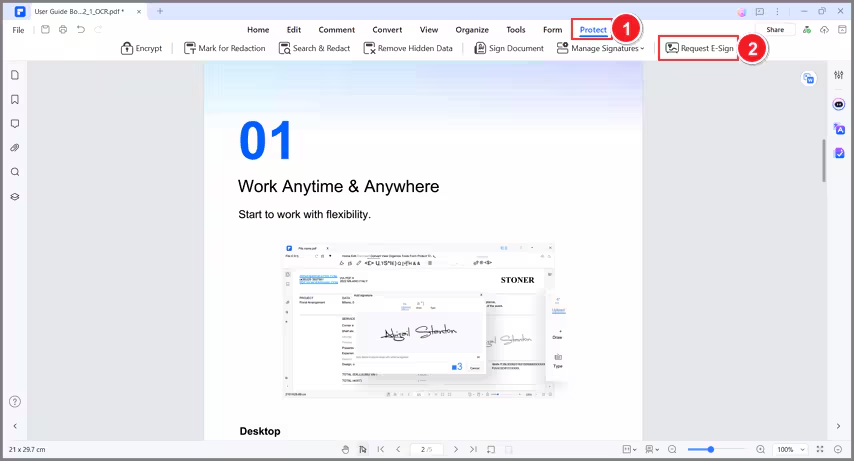
- Launch PDFelement and open the agreement that requires signatures. Click on the "Request eSign" button, conveniently located under the "Protect" tab.
- In the popup window, locate the "Add recipients" field. Add recipient email addresses in the desired signing order. Easily adjust the signing sequence using the intuitive drag-and-drop method. Optionally, employ the "Add CC" button to include email addresses for informational purposes.
- Opt to sign the document either first or last using the "Add me the first" or "Add me the last" option.
- Navigate to the settings section and decide on the desired email sending order. Set the frequency of reminders to ensure timely and effective completion of signatures.
- Click the "Next" button to move forward after configuring the settings.

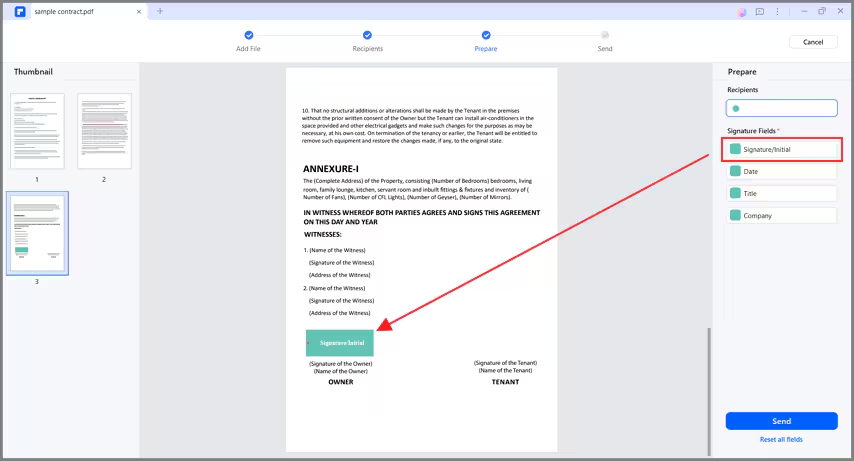
- Enhance the agreement by adding essential fillable fields. Incorporate fields such as Signature/Initial, Date, Title, and Company. Easily drag and drop these fields to appropriate locations within the agreement. Assign each field to the respective recipients as needed.
- After adding the required fields, ensure all elements are in place. Click the "Send" button to dispatch the agreement to recipients for signatures.
2. Track Signing Status
Keep a close watch on the progress of signatures by following these steps:
- Upon sending the agreement for signatures, locate and click "Go to Agreement List."

- To update the signing status, simply click the "Update" button.

- Stay informed about signer activities through notification emails. Receive updates when signers view or complete their signatures on the agreement.
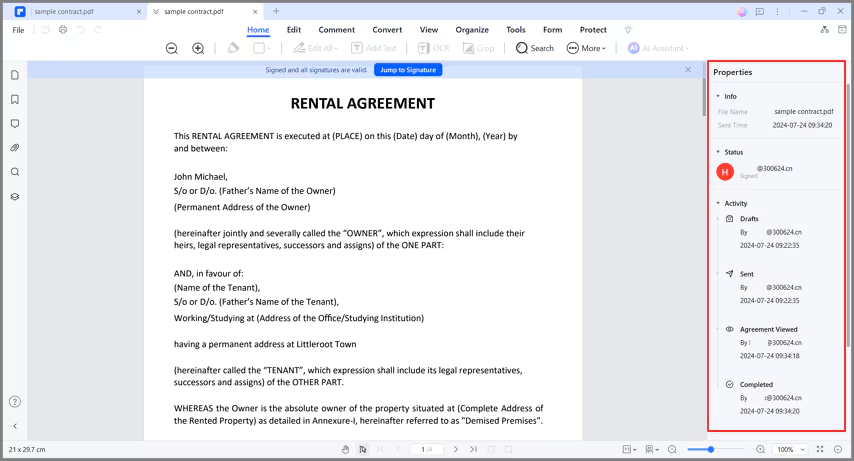
- After the signing process is finalized, locate and access your document within the "Agreement" panel.
- In the right-hand panel, you'll find a comprehensive display of all activities associated with the agreement. This provides a clear overview of the entire signing journey.
- Download both the agreement itself and the comprehensive audit report. The audit report presents all signing activities for your review.
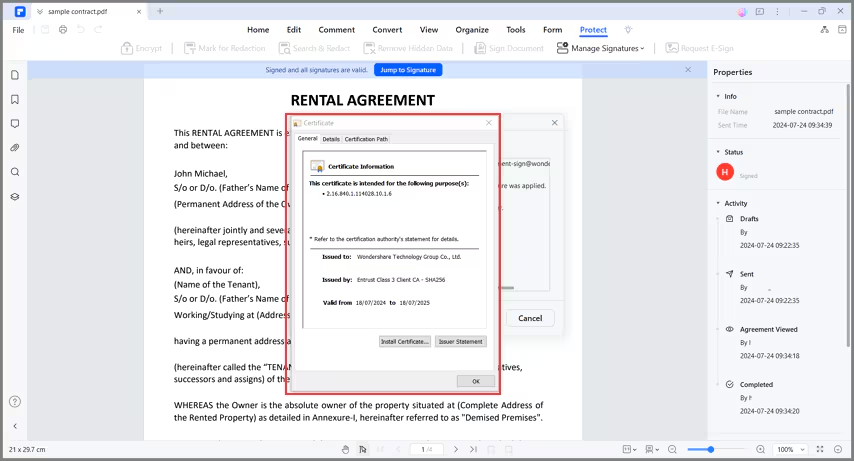
3. Validate the Signature
Ensure the validity of collected signatures with the following actions:
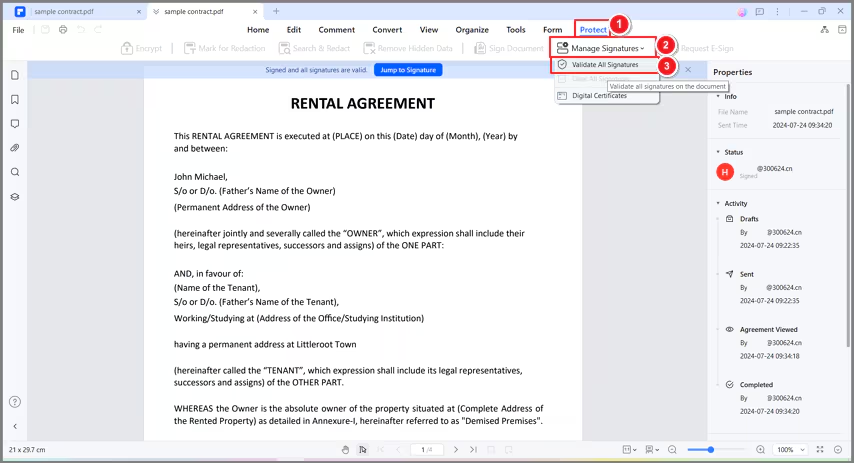
- Access the PDF agreement through the "Agreement" panel.

- Once the agreement is opened, observe a notification indicating "Signed and all signatures are valid."
- Click on "Manage Signatures" found under the "Protect" tab. Choose the "Validate All Signatures" option to proceed.
- In the "Validate All Signatures" window, check the digital signatures' information. Access the change history of the document since the signature was applied.
- To examine the certificate, select "Certificate Details…" within the window.

- The certificate will display essential information, including the issuer, validation date, and more.